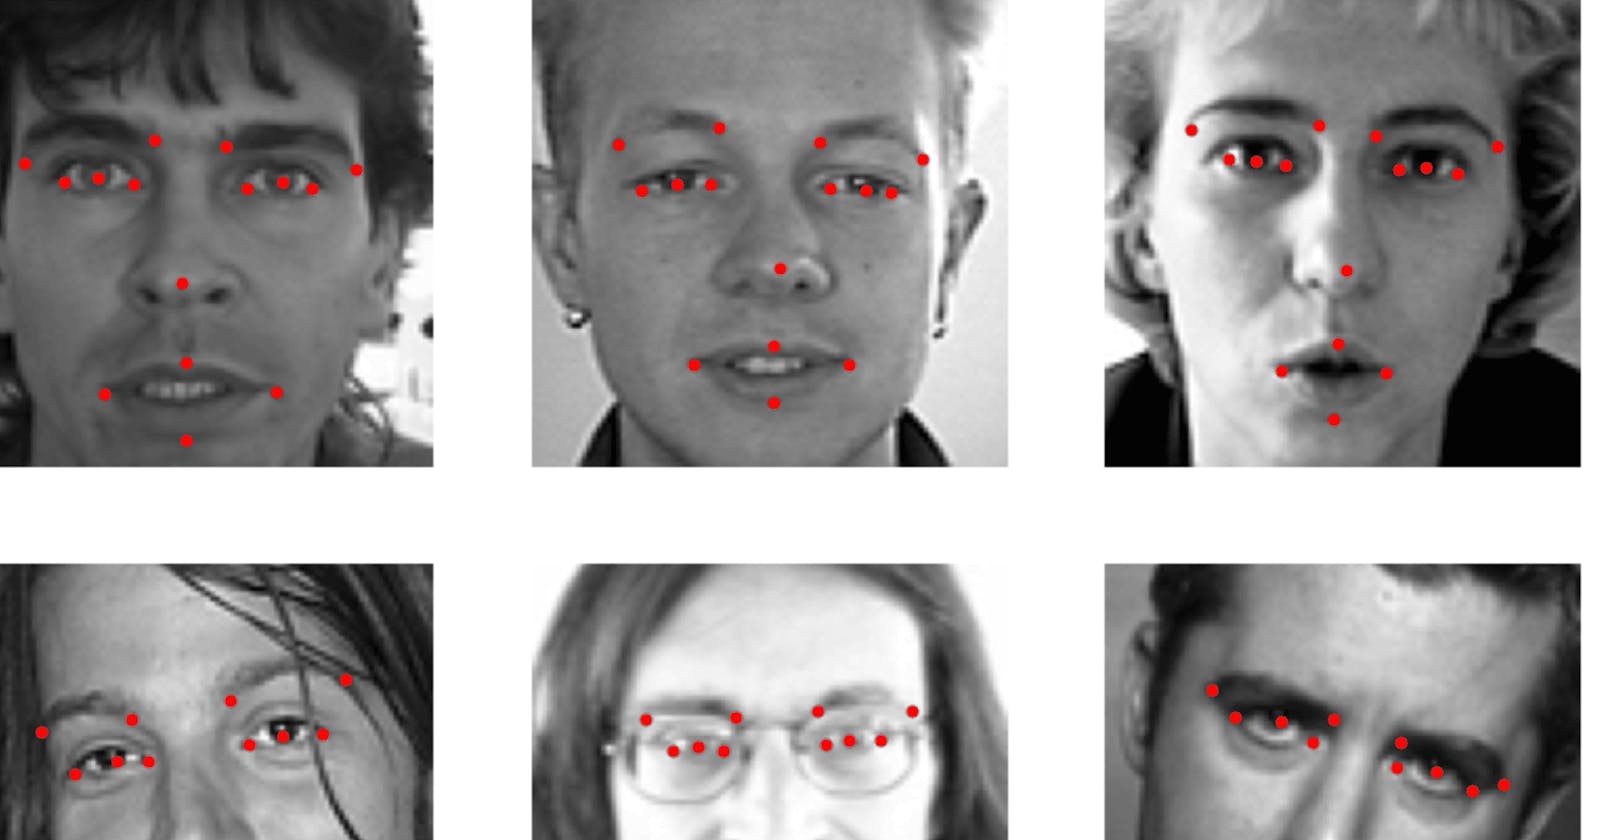
In this article, I create a deep learning model using the PyTorch framework that detects facial keypoint. This is a complete hands-on project. After completing this article you build a model that detects any face key point. Now let’s get started.
Note💥 — In this article, I do not use any pre-trained model to detect facial keypoint, this is a completely pure PyTorch code I write and build a neural network. Make sure you are using GPU⚡ for fast computing.
Keep reading! ⚡
# Chack: I am using GPU.
!nvidia-smi -L

# Output - GPU 0: Tesla T4 (UUID: GPU-084a983b-3275-deff-9bbd-2448eecfba65)
Import Required Libary For This Article
When working on any project the first step is to import all the library needs. The library🛠️ is the tool that helps you achieve tasks fast less time.⌛
# This is a complete library I use in this notebook
import os
import cv2
import numpy as np
import matplotlib.pyplot as plt
%matplotlib inline

from pandas.io.parsers import read_csv
from sklearn.utils import shuffle
import torch
from torch import nn
from torch.nn import functional as F
from torch.utils.data import Dataset,DataLoader
from torchvision import transforms
Data Download And Preprocess
I import all the libraries needed in my notebook, then my next step👣 is to download data and preprocess. I am creating this project using the Kaggle competition dataset. This dataset has images with 15 key points.🔑 If you are interested to learn more about this dataset so read here⚡.
I hope you download this dataset on your local machine if not don’t worry follow this step. 👣
First, go to the official dataset page link provided above.
Then go to the data page and see down below the black color button 🔄to text with Download just click it. 🖱️
Your download is started, when your download is complete then unzip the file.
Unzip Dataset 🤐—This is a command line unzip method, you can also manually unzip in your file explorer.
# First unzip the actual dataset provide on the Kaggle website.
!unzip /content/drive/MyDrive/new_article/Keypoint-Draw-With-DeepLearning/facial-keypoints-detection.zip

# If the above file unzips then see also two files formatted by .zip, one is training.zip and another is test.zip
# that two files are used in this article. so also unzip these two files
!unzip /content/training.zip
!unzip /content/test.zip

This time I created a function to load a .csv file and converted the NumPy array.
def load_data(path,test=False):
    """
    path: It's a actual dataset file path provide for you.
    test: If it's True than load test data, otherwise load training data
    """
    FTRAIN = path
    FTEST = path
    fname = FTEST if test else FTRAIN
    df = read_csv(os.path.expanduser(fname))  # load dataframes

    # The Image column has pixel values separated by space; convert into series of 1D-Array
    df['Image'] = df['Image'].apply(lambda im: np.fromstring(im, sep=' '))

    df = df.dropna()  # drop all rows that have missing values in them.
    X = np.vstack(df['Image'].values) / 255.  # Normalize pixel value [0, 1]
    X = X.astype(np.float32)
    X = X.reshape(-1, 96, 96, 1) # Reshape each images as 96 x 96 x 1

    if not test:  # only FTRAIN has target columns
        y = df[df.columns[:-1]].values
        y = (y - 255) / 255  # scale target coordinates to [-1, 1]
        X, y = shuffle(X, y, random_state=42)  # shuffle train data
        y = y.astype(np.float32)
    else:
        y = None

    return X, y
Now my function is ready. It’s time to use this function load_data ( ) to load training and testing data. Make sure you notice that the above function training dataset time has annotation but the testing dataset time doesn’t have annotation.
# Load training set
X_train, y_train = load_data(path = "training.csv")
print("X_train.shape == {}".format(X_train.shape))
print("y_train.shape == {}; y_train.min == {:.3f}; y_train.max == {:.3f}".format(
    y_train.shape, y_train.min(), y_train.max()))

# Once more time to say: Load testing set but notice this dataset doesn't have annotation so specify this _ becuse ignoring value.
X_test, _ = load_data(path = 'test.csv',test=True)
print("X_test.shape == {}".format(X_test.shape))


"""
Output ->`X_train.shape == (2140, 96, 96, 1)`

         `y_train.shape == (2140, 30); y_train.min == -0.985; y_train.max == -0.624`

          `X_test.shape == (1783, 96, 96, 1)`
"""
I have collected two datasets, both are formatted by the NumPy array. Now that you have looked down below👇🏻, I have created one class MyDataset( ) to convert the NumPy array to PyTorch dataset . Since PyTorch supports GPU faster computation, this is the reason I converted the dataset to PyTorch tensor.
class MyDataset(Dataset):
    def __init__(self, data, targets, transform=None):
        # load image data, and target value
        # If transform is not none than using some of the preprocess method in pytorch.
        self.data = data
        self.targets = targets
        self.transform = transform

    # This method return as whole length of dataset
    def __len__(self):
        return len(self.data)

    # And in this function to return as single data instance by index point.
    def __getitem__(self, index):
        x = self.data[index]
        y = self.targets[index]
        if self.transform:
            x = self.transform(x)

        return x, y
At this point, I have completely built a class. Now my next step is to use this class and also use DataLoader in PyTorch to create a batch of samples and shuffle the dataset. 🔰
transform = transforms.Compose([
    transforms.ToTensor(),
    transforms.RandomAdjustSharpness(2),
])
train_dataset = MyDataset(X_train,y_train,transform=transform)
train_loader = DataLoader(train_dataset,batch_size=32,shuffle=True)
Visualize Image With Annotation
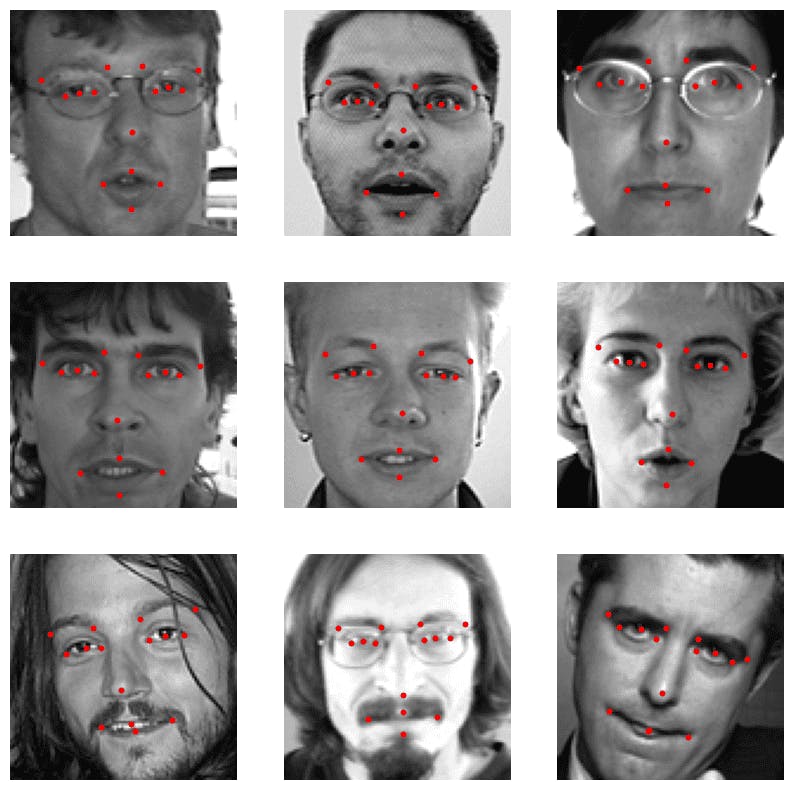
In this section, I create one function to display images with annotation in the training dataset and the same function I use for testing time🧪.
Note💥 — If you are confused by looking at my code, I suggest you see the code line by line and understand.
def plot_image_with_labels(data,model=None,nr=2,nc=3,figsize=(15,15),training_data=False):

  """
  data: It's actual dataset formated by numpy or pytorch dataloader.
        This value depand on training_data parameters.
  model: This parameter default set to None. becuse training dataset doesn't
         required model. only important testing time.
  nr: It's define number of row display in matplotlib subplots
  nc: It's define number of columns display in matplotlib subplots.
  figsize: It's give as width and hight formated by tuple. And this value specify to matplotlib figure in inches.
  training_data: It's specify to True than visualize image using for training data loader without model. And if it's false
                 than using Xtest Dataset With model.
  """

  if training_data:
    fig,axs = plt.subplots(nrows=nr,ncols=nc,figsize=figsize)
    for item in data:
        image, label = item

        for i in range(nr*nc):
          image_plot = axs[i//nc, i%nc].imshow(np.squeeze(image[i][0]),cmap='gray')

          label_p = label[i] * 255 + 255
          axs[i//nc,i%nc].scatter(label_p[0::2],label_p[1::2],s=10,c='r')
          axs[i//nc, i%nc].axis('off')
        break
    plt.show();

  # Define a transform to normalize the image only testing image.
  else:
    transform = transforms.Compose([
      transforms.ToTensor()])
    fig,axs = plt.subplots(nrows=nr,ncols=nc,figsize=figsize)
    if (nr*nc) <= len(data):
      for i in range(nr*nc):
        x_test = shuffle(data)
        image = x_test[i]
        image = transform(image)
        # Pass the image through the model to get the predicted keypoints
        with torch.no_grad():
          model.eval()
          output = model(image.unsqueeze(0).to(device))  # add a batch dimension

        output  = output.squeeze().cpu().numpy() * 255 + 255
        # Reshape the predicted keypoints into a numpy array
        label_p = output.reshape(-1, 2)
        image_plot = axs[i//nc, i%nc].imshow(image.permute(1, 2, 0),cmap='gray')
        axs[i//nc,i%nc].scatter(label_p[:,0],label_p[:,1],s=10,c='r')
        axs[i//nc, i%nc].axis('off')

      plt.show();
Now my visualization function is ready. Move on and use this function to see what an image looks like with annotation.⚡
plot_image_with_labels(train_loader,nr=3,nc=3,figsize=(10,10),training_data=True)

If you see my function nicely working on displaying images with annotations,
Note⚡— That all of the images are Gray-Scale, not a color. Now at this moment, all the steps are done, and the next step is to build our neural network.
Build Neural Network With Pytorch
It’s time to make our neural network ( brain ) using PyTorch. I am very excited about making a brain, and I hope you are too. 😋
In this article, I am creating a neural network architecture that looks like that 👇🏻

These are the steps I follow when building a model⚡
First, build one class and define the PyTorch neural network module.
The second step defines the init method and sets all layers followed by the above neural network image as shown.
The third step is to create a forward method to give actual input and pass through the layer.
class DFKModel(nn.Module):

  def __init__(self):
    super().__init__()

    self.conv1 = nn.Conv2d(in_channels=1, out_channels=16,kernel_size=(2,2),stride=1,padding='valid')
    self.conv1_1 = nn.Conv2d(in_channels=16, out_channels=32,kernel_size=(2,2),stride=1,padding='same')
    self.maxpool1 = nn.MaxPool2d(kernel_size=(2,2))
    self.conv2 = nn.Conv2d(in_channels=32,out_channels=64,kernel_size=(2,2),stride=1,padding='valid')
    self.conv2_2 = nn.Conv2d(in_channels=64,out_channels=32,kernel_size=(2,2),stride=1,padding='same')
    self.maxpool2 = nn.MaxPool2d(kernel_size=(2,2))
    self.dropout1 = nn.Dropout(0.5)
    self.linear1 = nn.Linear(in_features=16928,out_features=500)
    self.linear2 = nn.Linear(in_features=500,out_features=250)
    self.dropout2 = nn.Dropout(0.5)
    self.linear3 = nn.Linear(in_features=250,out_features=30)

  def forward(self,x):
    x = F.relu(self.conv1(x))
    x = F.relu(self.conv1_1(x))
    x = self.maxpool1(x)
    x = F.relu(self.conv2(x))
    x = F.relu(self.conv2_2(x))
    x = self.maxpool2(x)
    x = x.view(x.size(0),-1)
    x = self.dropout1(x)
    x = F.relu(self.linear1(x))
    x = F.relu(self.linear2(x))
    x = self.dropout2(x)
    x = self.linear3(x)
    return x
Once your neural network class is ready. Now move on and call the DFKModel class to create the model object.
model =  DFKModel()
# See model architacture look like.
print(model)

Extra step — ⚡
Visualize the architecture of the model⚡
I know this is an extra step but trust me It’s a very useful thing. Suppose you build a model where the model performance is very good, so your friends or people say can I see your model architecture. This time you visualize all the model architecture and save the image format. Then you share your model architecture with others.
Note⚡ — Good work takes time, but people don’t know what are you doing it’s time wasting. ⌛
An easy way to visualize the PyTorch model is to install torchview library.
This method uses time only you specify 3 parameters.
model — It’s input as an actual model class you using in this article.
input_size — it accepts input size same as the model specify
expand_nested — It indicates whether to expand nested modules graph.
save_graph — It’s specified to True then save visual architecture as png format.
!pip install torchview


"""
Output

Looking in indexes: https://pypi.org/simple, https://us-python.pkg.dev/colab-wheels/public/simple/
Collecting torchview
  Downloading torchview-0.2.6-py3-none-any.whl (25 kB)
Installing collected packages: torchview
Successfully installed torchview-0.2.6

"""
from torchview import draw_graph
model_graph = draw_graph(DFKModel(), input_size=(1,1,96,96),expand_nested=True,save_graph=True)
Once your above code is successfully run. Open the model.gv.png file and see if the above architecture matches successfully then move on to the next section.
Train Deep Neural Network
In this part, you see how to train the above neural network.
These are steps to follow when I train my model.⚡
Define the loss function to calculate how far the model predicts wrong.
Define the optimizer function to help optimize model performance.
Define the number epoch to specify how much time is during the training process.
And now loop through and train them, model.
# Define the loss function
criterion = nn.MSELoss()

# Define the optimizer
optimizer = torch.optim.Adamax(model.parameters(), lr=0.001)
device = torch.device('cuda')
model.to(device)
# Training loop
num_epochs = 200

for epoch in range(num_epochs):
    for i, (images, labels) in enumerate(train_loader):
        images, labels = images.cuda(),labels.cuda()
        # Clear the gradients
        optimizer.zero_grad()
        # Forward pass
        outputs = model(images).to(device)
        loss = torch.sqrt(criterion(outputs, labels))
        # Backward pass and optimize
        loss.backward()
        optimizer.step()
        # Print Epoch, Step and Loss value.
        if (i+1) % 100 == 67:
            print('Epoch [{}/{}], Step [{}/{}], Loss: {:.4f}'.format(epoch+1, num_epochs, i+1, len(train_loader), loss.item()))

My model training is complete and the next step is to see the model prediction performance of the testing dataset.
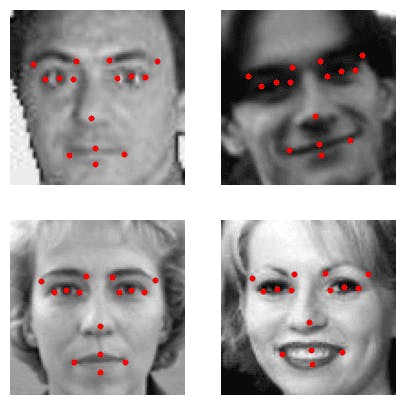
Model Predict On Testing Dataset
plot_image_with_labels(data=X_test,model=model,nr=2,nc=2,figsize=(5,5))

If you see the model working well for testing datasets.
Note ⚡— Sometimes the model performs not well we accept that case you can change some of the hyperparameters ( for example — learning rate, training longer, activation function, etc.. )
Model Using For Real-Time
In this section, you see how I can use the same model in real life. That time I am using the OpenCV Cascade classifier use, because my model only trains on the face of the human, not the whole body, so first detect where the face has in the frame or cropping face area, then resize the right shape for the model accepts on, then move on to pass through the model and get actual keypoint output, and then visual original image and facial keypoint.
# Download haarcascade forntalface default classifier is a pre-trained model
# or only face detection model provided by the OpenCV library

!wget https://raw.githubusercontent.com/hi-sushanta/Blog_Post/master/Facial-Key-Point-Detection/haarcascade_frontalface_default.xml

Now it’s time to save our model. Saving model PyTorch ( torch. save ) is a very easy process just pass some of the arguments your job is done!⚡
# First save the model
torch.save(obj=model.state_dict(),f="my_model.pth")
If you have done all of the steps above and now it’s time to see how to predict and visualize in the real-time video frame. This sounds more interesting, but notice this down below all code I running with PyCharm because that is more suitable for this step. And also make sure this all down below file is formatted by the .py extension not the .ipynb file.
In this section I create two files, one file is stored on model architecture, and another is stored on real-time camera access, image preprocessing, model initialize, model prediction, drawing keypoint, and many other things. Also, note this is my main file to run.
I name set to model architecture file Model.py, and the actual main file set to FKeypoint-Detection.py.
# This is all of the code pasted on the Model.py file.
from torch import nn
import torch.nn.functional as F

class DFKModel(nn.Module):

    def __init__(self):
        super().__init__()

        self.conv1 = nn.Conv2d(in_channels=1, out_channels=16, kernel_size=(2, 2), stride=1, padding='valid')
        self.conv1_1 = nn.Conv2d(in_channels=16, out_channels=32, kernel_size=(2, 2), stride=1, padding='same')
        self.maxpool1 = nn.MaxPool2d(kernel_size=(2, 2))
        self.conv2 = nn.Conv2d(in_channels=32, out_channels=64, kernel_size=(2, 2), stride=1, padding='valid')
        self.conv2_2 = nn.Conv2d(in_channels=64, out_channels=32, kernel_size=(2, 2), stride=1, padding='same')
        self.maxpool2 = nn.MaxPool2d(kernel_size=(2, 2))
        self.dropout1 = nn.Dropout(0.5)
        self.linear1 = nn.Linear(in_features=16928, out_features=500)
        self.linear2 = nn.Linear(in_features=500, out_features=250)
        self.dropout2 = nn.Dropout(0.5)
        self.linear3 = nn.Linear(in_features=250, out_features=30)

    def forward(self, x):
        x = F.relu(self.conv1(x))
        x = F.relu(self.conv1_1(x))
        x = self.maxpool1(x)
        x = F.relu(self.conv2(x))
        x = F.relu(self.conv2_2(x))
        x = self.maxpool2(x)
        x = x.view(x.size(0), -1)
        x = self.dropout1(x)
        x = F.relu(self.linear1(x))
        x = F.relu(self.linear2(x))
        x = self.dropout2(x)
        x = self.linear3(x)
        return x
# Import some of the required library
import cv2
import torch
import numpy as np
from torchvision import transforms
from Model import DFKModel

# Initialize cascaded classifier class.
face_cascade = cv2.CascadeClassifier(r"C:\Users\hiwhy\OneDrive\Documents\Blog_post\Facial-Key-Point-Detection\haarcascade_frontalface_default.xml")

# Initialize DFKModel class
model = DFKModel()
# Load pre-trained model
model.load_state_dict(torch.load('my_model.pth',map_location=torch.device('cpu')))
model = model.to(torch.device('cpu'))
# 0 mean capture the my first camera.
# If you using video than specify actual path.
cap = cv2.VideoCapture(0)
# Window name specify and full screen Display
window_name = 'Facial Keypoint Detection'
cv2.namedWindow(window_name, cv2.WND_PROP_FULLSCREEN)

# Pytorch transformation create
transform = transforms.Compose([
    transforms.ToTensor()])


while True:
    # read the frame.
    is_frame, frame = cap.read()
    # If any problem don't come frame than loop exit.
    if not is_frame:
        break
    # Convert BGR2RGB and then RGB2GRAY
    image = cv2.cvtColor(frame,cv2.COLOR_BGR2RGB)
    gray_image = cv2.cvtColor(image,cv2.COLOR_RGB2GRAY)
    faces = face_cascade.detectMultiScale(gray_image, 1.25, 6)
    if len(faces) > 0:
        for (x, y, w, h) in faces:
            face_crop = gray_image[y:y + h, x:x + w]
            resized = cv2.resize(face_crop, (96, 96)) / 255
            normalised_image = np.copy(resized)
            reshaped_image = normalised_image.reshape(-1, 96, 96, 1)
            key_image = transforms.ToTensor()(reshaped_image[0])
            # pytorch specify don't using computed gradients since don't update parameter.
            with torch.no_grad():
                model.eval()
                facial_keypoint_predictions = model(key_image.unsqueeze(0).type(torch.float32))
            output = facial_keypoint_predictions.squeeze().cpu().numpy() * 255 + 255
            label_p = output.reshape(-1, 2)
            for i in range(label_p.shape[0]):
                cv2.circle(frame, (int((label_p[i, 0]) * (w / 96) + x), int((label_p[i, 1]) * (h / 96) + y)), 4,
                        (0, 255, 0), -1)
    cv2.imshow(window_name, frame)

    key = cv2.waitKey(1)

    if key == ord("q") or key == ord("Q") or key == 27:
        break

cap.release()
cv2.destroyAllWindows()
If you successfully create two files and paste this code. now run the FKeypoint-Detection.py file and see real-time facial keypoint detection similar to my video.
Let’s add sunglass 😎 so it looks cool!
All the code you found here — GitHub
