

Thanks for joining the new TextToImage world. In this article, you learn about how to create text-to-image using the Hugging Face pretrain model. It’s based on completely practical only just a few lines of code to complete this task and use every day. It’s sound good. Yeah I know
Now first see what I cover in this article
What Is Text to Image Generator?
Install Some Of The Required library
Create a New Python File And Write Code
Display The Output And Save it
What Is Text to Image Generator?
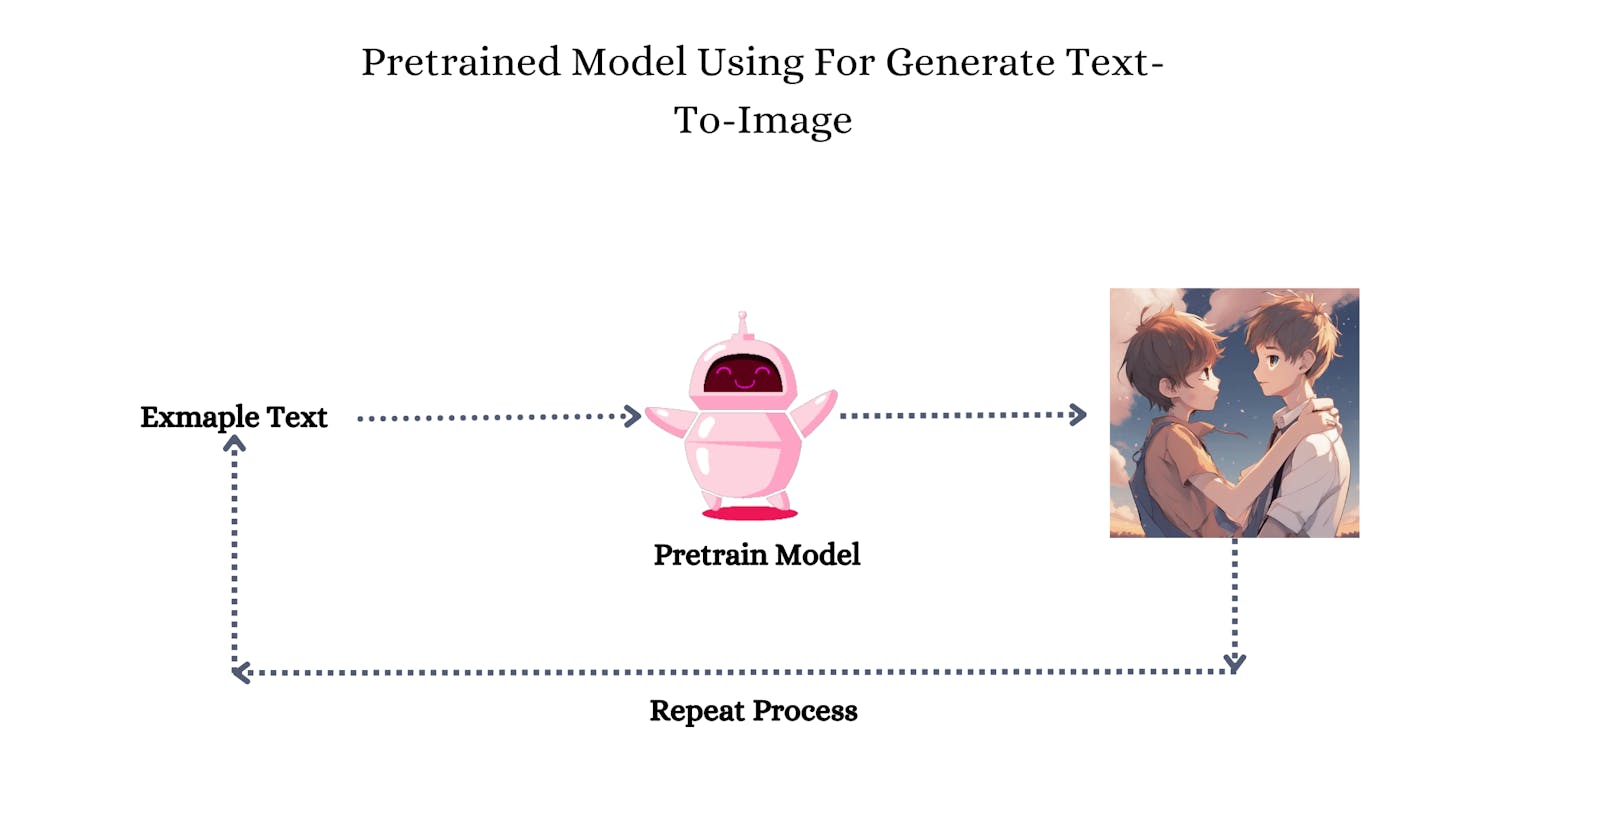
Text-To-Image generator is a type of Artificial intelligence (AI). That Model’s main focus is on creating images from text descriptions. It does this by using a complex neural network to learn the relationship between text and images. When you input the text-to-image generator text description, it will generate an image that matches the description as closely as possible.
You don’t understand what is meant above the text so don’t worry this is an extra one for explaining like a child can understand.
Real Life Example I think you are a good artist for drawing anything you want, but the question is all people do not love the same drawing. So now one friend comes from you and says Please can you create this type of image. Now you say yes, why not, please only provide a description of the image that helps me to create an image similar to the description you provide.
So now you understand what actually do Text-To-Image Generator. If yes or not please comment below becuse It’s required for me to improve my article.
Install Some Of The Required library
In this section, you install all libraries for using pip. Also requires some “GPU” for fast computation, so your job is a fast Install Nvidia driver in your specific OS. If you use a cloud platform like Google Colab or others they already install for you.
Follow these steps : 👇🏻
Open the terminal
Write this command step by step.
If you are more curious about where comes from this model then please check out this link.
pip install diffusers --upgrade
pip install invisible_watermark transformers accelerate safetensors
pip install matplotlib
# And Also make sure Numpy using as latest
pip install --upgrade numpy
Create a New Python File And Write Code
It’s an optional step for creating a PyThon file becuse it’s also you can use Jupiter Notebook. Important is that only code defines how to create text to image. This code takes a little bit of time for the first time so please take a break.
from diffusers import DiffusionPipeline
import torch
import numpy as np
import matplotlib.pyplot as plt
pipe = DiffusionPipeline.from_pretrained("stabilityai/stable-diffusion-xl-base-1.0", torch_dtype=torch.float16, use_safetensors=True, variant="fp16")
pipe.to("cuda")
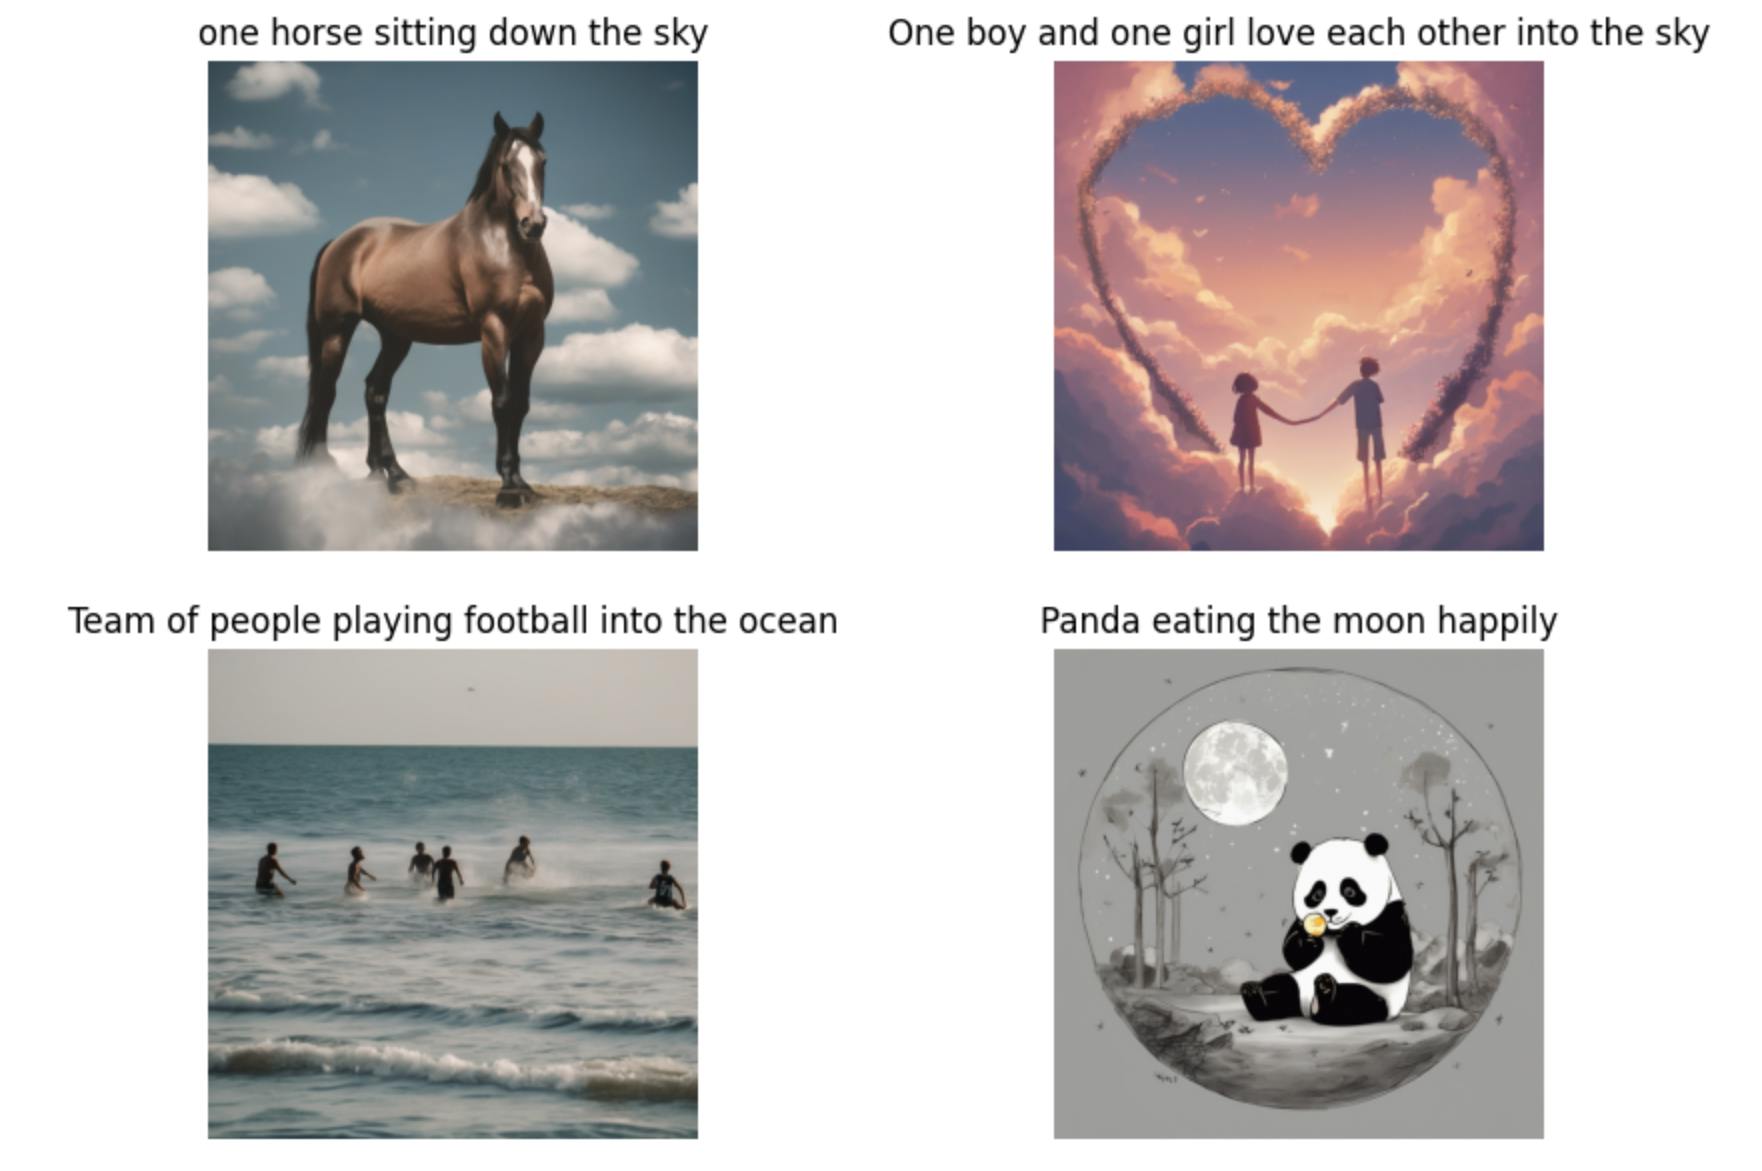
# Create 4 images for display as output next section.
prompt = ["one horse sitting down the sky",
"One boy and one girl love each other into the sky",
"Team of people playing football into the ocean",
"Panda eating the moon happily"]
images1 = pipe(prompt=prompt[0]).images[0]
images2 = pipe(prompt=prompt[1]).images[0]
images3 = pipe(prompt=prompt[2]).images[0]
images4 = pipe(prompt=prompt[3]).images[0]
Display The Output And Save It
If you successfully create 4 images and store them as different variables now to display and see what looks like. It’s simple, becuse I use the matplotlib library to display images with text. If the display code runs properly. then you move on to the next code to save it file locally.
# create figure
fig = plt.figure(figsize=(10, 7))

rows, columns = 2,2

# Adds a subplot at the 1st position
fig.add_subplot(rows, columns, 1)

# Showing the first image
plt.imshow(images1)
plt.axis('off')
plt.title(prompt[0])

# Adds a subplot at the 2nd position
fig.add_subplot(rows, columns, 2)

# Showing the second image
plt.imshow(images2)
plt.axis('off')
plt.title(prompt[1])

# Adds a subplot at the 3rd position
fig.add_subplot(rows, columns, 3)

# Showing the third image
plt.imshow(images3)
plt.axis('off')
plt.title(prompt[2])

# Adds a subplot at the 4th position
fig.add_subplot(rows, columns, 4)

# Showing the fourth image
plt.imshow(images4)
plt.axis('off')
plt.title(prompt[3])

# Saving Image locally
images1.save(prompt[0]+".jpg")
images2.save(prompt[1]+".jpg")
images3.save(prompt[2]+".jpg")
images4.save(prompt[3]+".jpg")
Output 🔻
Thanks for reading! If you have any questions about this article, please leave a comment below or send me a message on LinkedIn or Twitter. I’m always happy to help.